
Are you looking to improve the user experience on your long-form blog posts? A “Reading Progress” bar is a fantastic way to let your visitors know exactly how far they are in an article. Today, we’re excited to introduce the brand-new Reading Progress feature in the Plover Kit plugin!
If you are new to WordPress, don’t worry—Plover Kit makes this incredibly simple without needing to touch a single line of code.
What is Plover Kit?
Plover Kit is a powerful free WordPress plugin designed to enhance the default Gutenberg block editor. It acts as a modular toolkit, adding advanced layout controls, beautiful patterns, custom blocks, and interactive effects. Essentially, it turns your standard editor into a true page builder while keeping your site lightning fast.
The Reading Progress module is one of its newest additions. It adds a sleek, visual progress bar (usually pinned to the top of the screen) that fills up as the user scrolls down your post. It gives readers a sense of achievement and a clear indicator of how much content is left.
How to Enable the Reading Progress Feature
Setting this up is a breeze. Because Plover Kit uses a “modular” design, you only turn on the features you actually need, which guarantees your website won’t be slowed down by unused code.
- Install the Plugin: If you haven’t already, install and activate the Plover Kit plugin from the WordPress plugin directory.
- Go to Modules: In your WordPress Dashboard, navigate to Plover Kit → Modules.
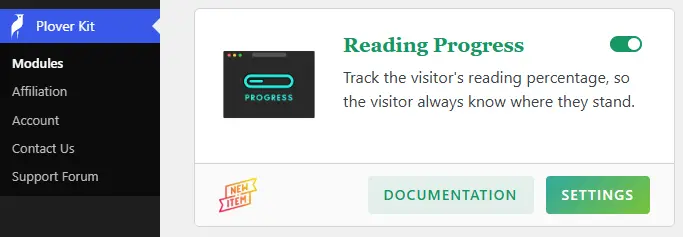
- Turn it On: Find the Reading Progress module in the list and toggle the switch to turn it on.
Customize the Reading Progress Bar
Once the module is enabled, you’ll probably want to adjust how the progress bar looks so it matches your website’s colors and branding.
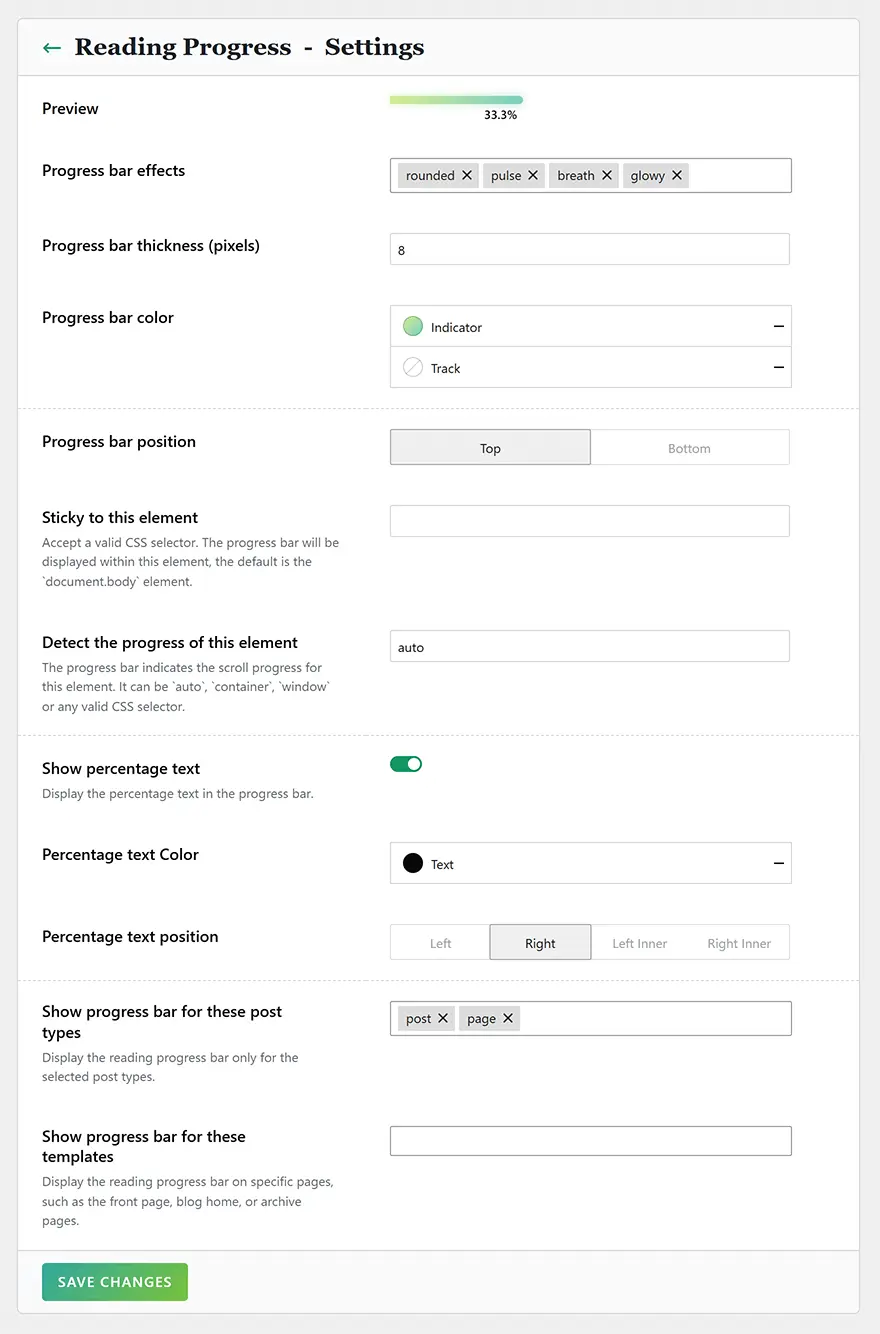
To do this, go to WordPress Dashboard → Plover Kit → Modules → Reading Progress → Settings. In this settings panel, you can easily tweak the design and behavior of your progress bar globally across your entire site.
While most options are self-explanatory, here are the key advanced settings you should know about to get the most out of this feature:
Progress bar effects

This option offers multiple visual styles for your bar: rounded, pulse, breath, glowy, and striped. The best part? This is a multi-select field, meaning you can stack different effects together to create a truly unique, eye-catching animation!
Sticky to this element (Premium)
A premium option that accepts any valid CSS selector. By default, it is set to document.body (the main page container). However, you can use this to inject and pin the progress bar inside a specific element—like your site’s navigation header or a particular sidebar block.
Detect the progress of this element (Premium)
This advanced setting controls what the progress bar is actually measuring. It accepts values like auto, container, window, or a specific CSS selector.
The element being measured must be scrollable; typically, it has a fixed height and the CSS property overflow-y: auto.
-
window(Default): Measures the scrolling progress of the entire webpage. -
container: Automatically tracks the progress of the element you specified in the Sticky to this element option. -
CSS selector: Tracks the progress of the element you specified.
Show progress bar for these post types
This allows you to choose exactly which post types display the progress bar. The free version supports standard post (blog posts) and page post types, while the Premium version unlocks custom post types (like portfolios, products) and attachment pages.
Show progress bar for these special pages (Premium)
A dedicated premium setting that gives you granular multi-select control to display the progress bar on special archive and listing views—such as your front page, blog home page, or category/archive page.
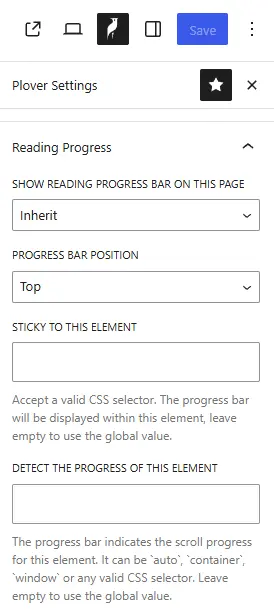
Specify Page Settings (Premium Feature)
Sometimes, a global setting isn’t enough. You might want to show or hide the progress bar entirely on certain landing pages.
If you are using Plover Kit Premium, you can override the global settings on a page-by-page basis! Here is how:
- Open the post or page you want to edit in the WordPress Block Editor.
- Look to the upper-right corner of the editor and click the Plover logo icon.
- This opens the Plover page settings sidebar, where you can adjust or disable the reading progress just for this specific piece of content.
Final Thoughts
Adding a Reading Progress bar is a tiny visual detail that makes a massive difference in keeping your readers engaged. But that is just the tip of the iceberg! Plover Kit is packed with other lightweight modules that pair perfectly with it to build a world-class blog layout without bloating your site:
- Reading Time Block: Want to prepare your readers before they dive in? Drop this block at the beginning of your posts to show an auto-calculated estimated reading time (e.g., “5 min read”).
- Table of Contents: Auto-generates an interactive, nested list of headings so readers can instantly jump to different sections of your long guides.
- Rough Notation Effect: Emphasize critical sentences by mimicking hand-drawn annotations like circles, highlights, and underlines as users scroll.
Ready to upgrade your site’s user experience? Download Plover Kit for free today, or upgrade to Premium to unlock the full power of advanced layouts and granular progress tracking!