In the modern WordPress era, icons are more than just decoration — they are essential navigation cues and brand touchpoints. However, many users struggle with a “fragmented” workflow: downloading an SVG, figure out how to upload it (WordPress blocks SVG uploads by default for security reasons ), and then insert it into your page using custom HTML or a shortcode, manually adjusting the size in the Block Editor, and repeating that process dozens of times.
The problem is particularly pronounced when collaborating with a team, everyone uses a different set of icons, leading to a fragmented visual style across the website.
These issues seem minor, but they constantly chip away at your efficiency during daily maintenance. The approach offered by the Plover Kit plugin might just change how you think about icon management in WordPress — Instead of treating icons as individual images, it treats them as a managed design asset. it’s not just about providing icons, but about offering a complete workflow integrating Icon Libraries, Icon Blocks, and Icon Buttons that works seamlessly with the Gutenberg ecosystem.
Here is how this logical workflow solves the most common design headaches in WordPress.
Step 1: Building Your WordPress Icon Library
The Icon Library is the cornerstone of Plover Kit’s icon tools. With the icon library in Plover Kit, you can easily manage and organize your icons in one place, ensuring efficient workflow.
Creating Your First Icon Library
After installing and activating the Plover Kit plugin, you can access the icon library via “WordPress Dashboard -> Plover Kit -> Modules -> Icon Library”
Just as you organize media with folders, Plover Kit lets you create named icon libraries directly in your WordPress dashboard. You might create libraries for “Social Media Icons,” “Product Features,” “Brand Assets,” or any other category that makes sense for your site.
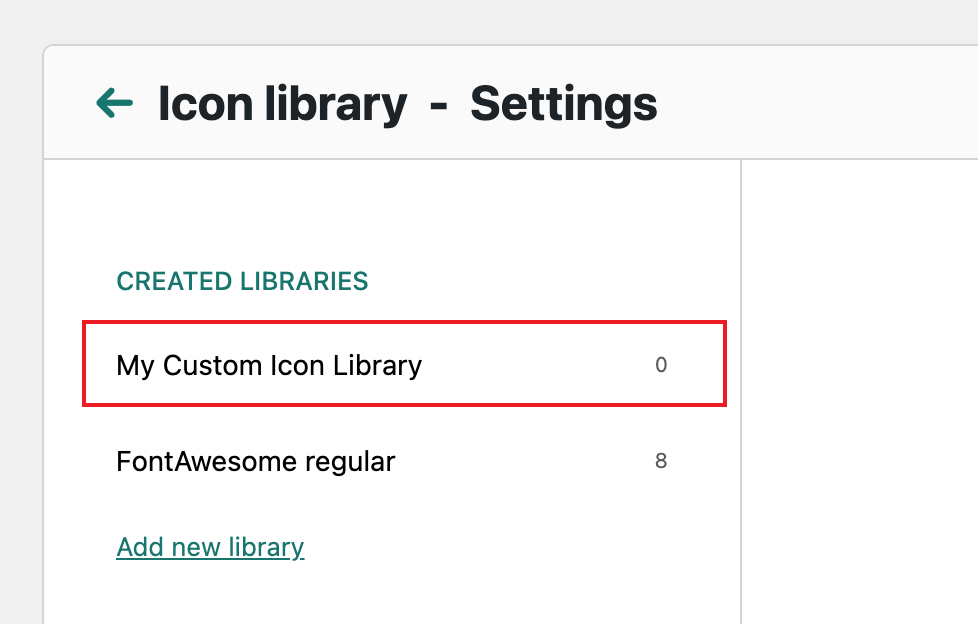
To create your own icon library, first to click on the Add new library link in the sidebar.
Then, enter the name of the icon library you want to create in the input. After you have finished typing, simply press Enter Key to save.
Now, you get an empty icon library. You can import icons from the cloud collection or upload your own SVG icons later.
Import from Cloud Icon Collections
Once your library is created, you don’t need to leave WordPress to populate it. Plover Kit includes integration with cloud icon sets, giving you access to thousands of free icons (including popular sets like FontAwesome) that you can browse, select, and import in bulk . This eliminates the tedious process of downloading individual files from external websites.
You can pick your favorite icons from the collections and with a fews clicks to import them into your icon library and use them in your designs later.
First, select an icon collection from the left sidebar and choose some icons from it.
Then click the Import to Library button in the bottom right corner.
In the modal that pops up, you need to select the library you want to import from the drop-down list.
You can also add a new library by clicking Add New Library link. You can find details of this operation in the previous steps.
Next and final step, just click the Import Icons to Library button.
Upload Your Own SVG Icons
For true brand consistency, you’ll often need custom icons that reflect your unique identity. Plover Kit’s Premium plan allow you to upload your own SVG icon files directly to your libraries .
This addresses a fundamental WordPress limitation: by default, WordPress doesn’t allow SVG uploads due to security concerns (SVG files can contain malicious code) . Plover Kit handles this safely by sanitizing uploaded SVGs, removing any potentially harmful code while preserving the visual integrity of your icons.
However, you should always exercise caution with SVG icons from unknown sources to guard against potential security threats.
In the Premium version After you select a created icon library from the left sidebar, you will see an Upload Icon button in the right window.
Click on it and the upload area will appear.
You can drag and drop the SVG icon to the upload area or click on the upload area and then manually select the SVG icon from the pop-up file manager to complete the upload .
Pro tip: When creating custom icons, use vector-based tools like Figma or Adobe Illustrator, and optimize them with tools like SVGO before uploading to ensure fast loading times
Step 2: From Library to Layout: Three Ways to Deploy
Once your library is set up, Plover Kit provides three ways to bring those icons to life within the Gutenberg editor.
1. Icon Block: Visual Storytelling
Icon Block is customizable icon elements that you can easily insert into your WordPress posts, pages, or themes. You can choose any icon from your icon library and place it directly into your design. Icon Bllock is particularly suitable for “Features” sections or landing page highlights.
To add the Plover Icon block, open the block inserter by clicking the (+) icon on the upper left corner of the editor. After that, look for Plover Icon using the search bar and click it to insert the block into the editor.
Alternatively, Icon Block is a variant of Paragraph block and you can transform from Paragraph block to Icon Block.
After adding a Plover Icon Block in the Gutenberg editor, you can:
- Browse and choose icons from your icon libraries directly from the block settings panel
- Adjust size with precision using multiple units (px, %, em, rem, vw) — you can even drag to resize visually
- Control colors, alignment, borders, and padding
- Add links to make icons clickable
- …
The block integrates perfectly with the WordPress Site Editor and follows core WordPress design patterns, so it feels native to the platform
2. Button Icons: Enhancing UX in WordPress
Buttons are vital in guiding users through your WordPress site, and adding icons to buttons can make them more engaging. Plover Kit’s Button Icons feature allows you to add icons to buttons, improving their visual appeal and functionality. You can:
- Add icons to any button, positioned left or right of the text
- Choose any icon from your icon libraries directly from the button block settings panel
- Adjust the size, and tweak alignment to make buttons look more professional and engaging.
3. Inline Icon (Premium): Seamless Typography
Inline Icons let you incorporate icons directly within text elements (paragraph, heading, list, etc.) in your WordPress site. This feature is perfect for integrating small icons alongside text in posts, lists, or menus. Plover Kit makes it easy to:
- No need to use container blocks to combine icon and text, embed icons within paragraphs, headings, or lists without disrupting the flow of your content.
- Adjust icon size, alignment, and color to ensure they blend seamlessly with the surrounding text, improving the overall design.
Inline Icon is available through the rich text formatting toolbar. When you select a piece of text in a Paragraph or Heading block, you can insert inline Icon with the More options menu in the Rich Text toolbar.
Then, in the pop-up, you can select icons from the icon library just like you would with icon block, and adjust the alignment and color of the icon.
Getting Started with Plover Kit
Ready to transform your WordPress icon workflow?
Plover Kit is a modular block plugin that supercharges Gutenberg with a beautiful pattern library, custom blocks (icons, animations, magazine layouts, tables of contents), and advanced design controls — all while keeping your site fast. Build professional websites without code. Seamlessly integrates with WordPress and most block themes, turning the editor into a true page builder.
Getting started with Plover Kit is straightforward:
- Install the plugin from your WordPress dashboard by navigating to Plugins → Add New and searching for “Plover Kit,” or download it directly from the WordPress.org repository .
- Activate the plugin and you’ll notice a new “Plover Kit” menu item in your WordPress admin sidebar.
- Explore the Modules dashboard — one of Plover Kit’s most thoughtful features is its modular architecture. You’re not forced to load every feature; instead, you can selectively enable only the modules you need for your specific project . This keeps your site lightweight and ensures you’re only loading functionality that serves your design goals.