Debugging is an essential part of maintaining a WordPress site, when working on your WordPress website, you might run into errors caused by a theme, plugin, or custom code.
Enabling WordPress debug mode allows you to identify and troubleshoot issues effectively. This article will guide you through the steps to enable debug mode in WordPress.
Why Enable WordPress Debug Mode?
WordPress Debug Mode is a feature that enables detailed logging and displays PHP errors, warnings, and notices that occur on your WordPress sites. This mode is essential for developers to identify and diagnose issues with themes, plugins or core functionality.
Sometimes when you update or install a plugin, theme or just update the WordPress core itself can cause a conflict on your site.
Enabling debug mode can help you pinpoint issues on your WordPress site and fix them quickly.
Let’s look at how to enable the WordPress debug mode. We will provide two methods, one is using a plugin and the other is manually.
Method 1: Enable WordPress Debug Mode Using a Plugin
If you’re not comfortable with coding or online file management, or can’t access your site’s files, you can use the plugin to enable WordPress debug mode.
WP Debugging is a popular plugin to turn on WP_DEBUG without touching your site’s files.
First, you’ll need to install and activate the WP Debugging plugin.
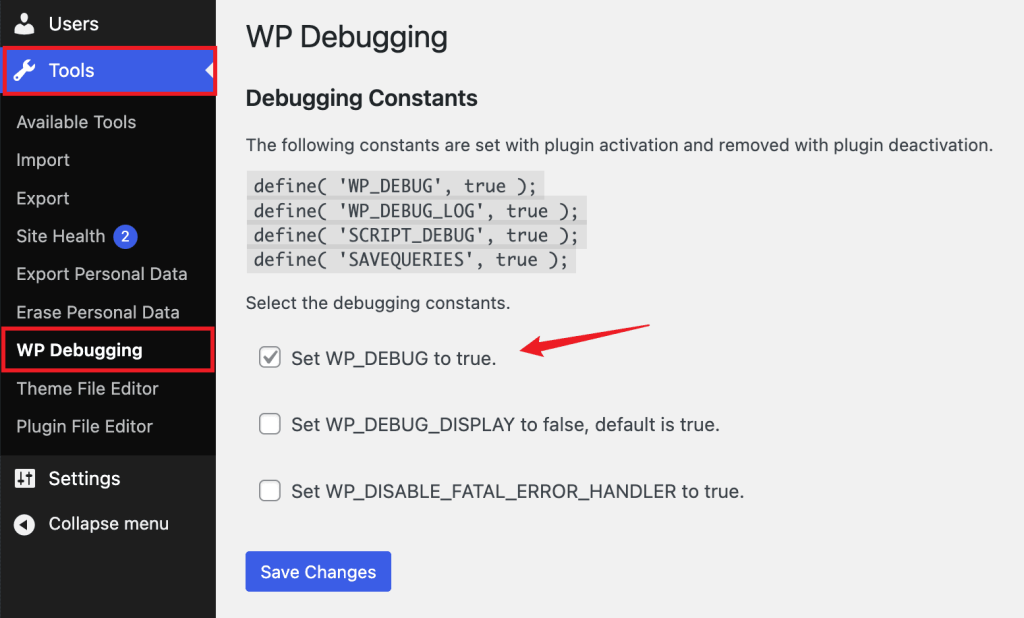
Upon activation, you can go to Tools » WP Debugging from your WordPress dashboard. Ensure that the ‘Set WP_DEBUG to true‘ option is enabled and then click Save Changes button.
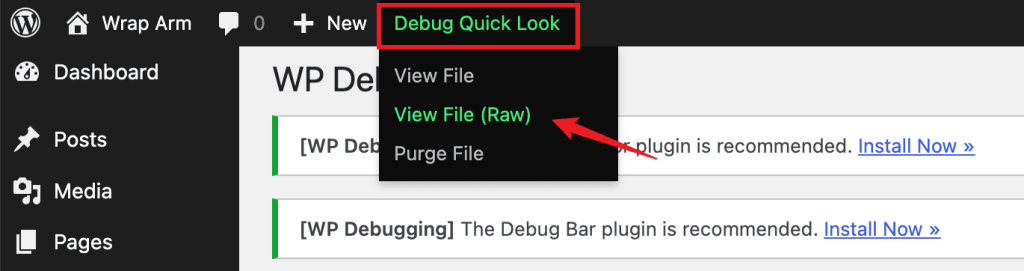
After that, you’ll see a ‘Debug Quick Look‘ menu item added to your admin bar at the top.
Go ahead, hover over it, and then click the “View File (Raw)” link.
This will open the log file containing all the errors on the site. You will then be able to find out what is wrong on your website and fix it quickly.
Don’t forget to disable this plugin once you’ve finished debugging the site.
Method 2: Enable WordPress Debug Mode Manually
The second method for enabling WordPress debug mode is to edit the wp-config.php files manually. This method gives you more control, which is useful if your site is completely inaccessible due to an error.
Here is the Step-by-Step guide to enable debug mode manually.
Step 1: Access Your WordPress Files
To enable debug mode, you need to access your WordPress installation files. You can do this via:
- FTP Client: Use an FTP client like FileZilla to connect to your server.
- File Manager: If your hosting provider offers a control panel (like cPanel), you can use the File Manager to access your files.
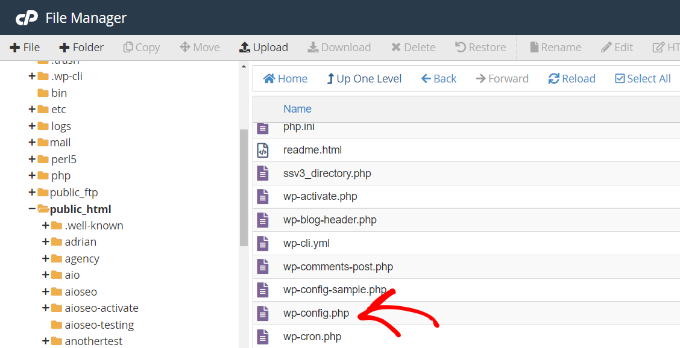
Step 2: Locate the wp-config.php File
Once you have access to your WordPress files, navigate to the root directory of your WordPress installation. Look for the wp-config.php file, which is typically located in the same directory as folders like wp-content, wp-admin, and wp-includes.
Step 3: Edit the wp-config.php File
- Open the wp-config.php file: Right-click on the file and select “Edit” or download it to your local machine and open it with a text editor.
-
Find the line that says
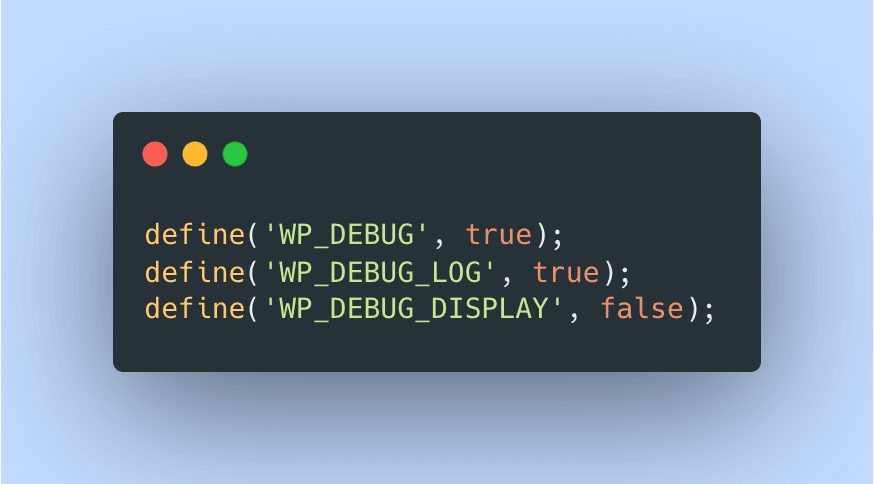
/ *That's all, stop editing! Happy blogging.* /: This line is usually near the bottom of the file. - Add the following lines above that line:
define('WP_DEBUG', true);
define('WP_DEBUG_LOG', true);
define('WP_DEBUG_DISPLAY', false); -
WP_DEBUG: This enables the debug mode. -
WP_DEBUG_LOG: This saves all errors to a debug.log file located in thewp-contentdirectory. -
WP_DEBUG_DISPLAY: This controls whether errors are displayed on the screen. Setting it tofalseis recommended for live sites to avoid exposing sensitive information to users.
Step 4: Save Changes
After adding the above lines, save the changes to the wp-config.php file. If you are using an FTP client, make sure to upload the modified file back to your server.
Step 5: Check for Errors
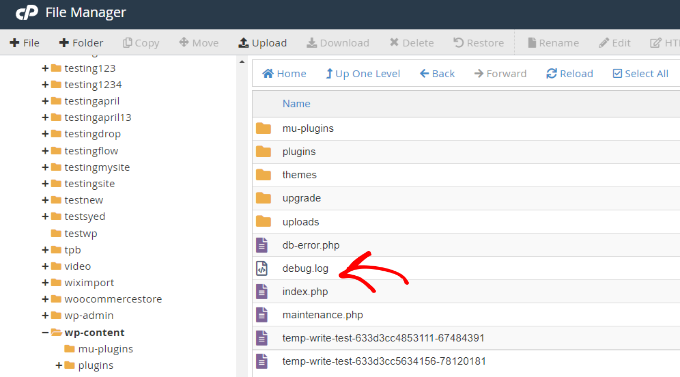
Now that debug mode is enabled, you can reproduce the error on your site. If there are any issues, they will be logged in the debug.log file located in the wp-contentdirectory. You can access this file using your FTP client or File Manager.
Step 6: Disable Debug Mode (Optional)
Once you have identified and fixed the errors, it is a good practice to disable debug mode on your live site. To do this, simply change the value of WP_DEBUG to false:
define('WP_DEBUG', false);Best Practices for Debugging WordPress
Please follow best practices to ensure your debuging process is smooth and safe.
First, avoid displaying error messages on your live site, as this may reveal sensitive information to visitors. Instead, set WP_DEBUG_LOG to true and set WP_DEBUG_DISPLAY to false to log errors to a file so you can view the error message without displaying it to the public.
For safer testing, use a staging environment – a copy of your site where you can troubleshoot without affecting your live site. If you must debug on your live site, activate maintenance mode to prevent visitors from accessing the site while you are troubleshooting. This way, you can address the issue without disrupting the user experience.
Conclusion
Enabling WordPress debug mode is a straightforward process that can significantly aid in troubleshooting errors on your site. By following the steps outlined above, you can quickly identify issues and work towards resolving them. Remember to disable debug mode on live sites to maintain security and prevent the exposure of sensitive information.